Preparación
Turn off the water supply before dismantling your old unit.
1 - If major work is done on the home, the water network must be flushed of all impurities to avoid damaging your mixer.
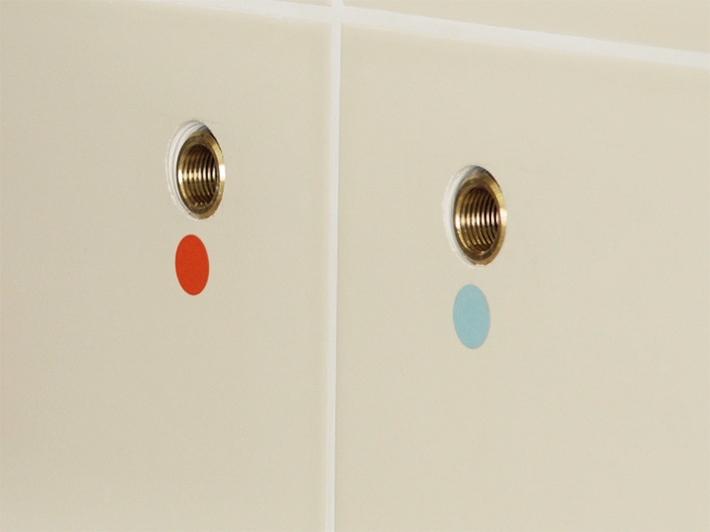
2 - Before dismantling your old unit, make sure the hot water feed is on the left, and that the cold water feed is on the right. Call a professional if that is not the case.
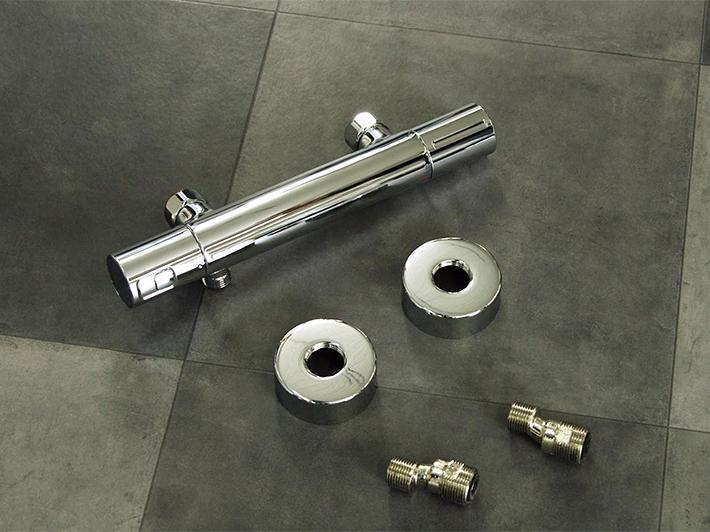
3 - Prepare parts and tools with close access to the connections.
Preparación
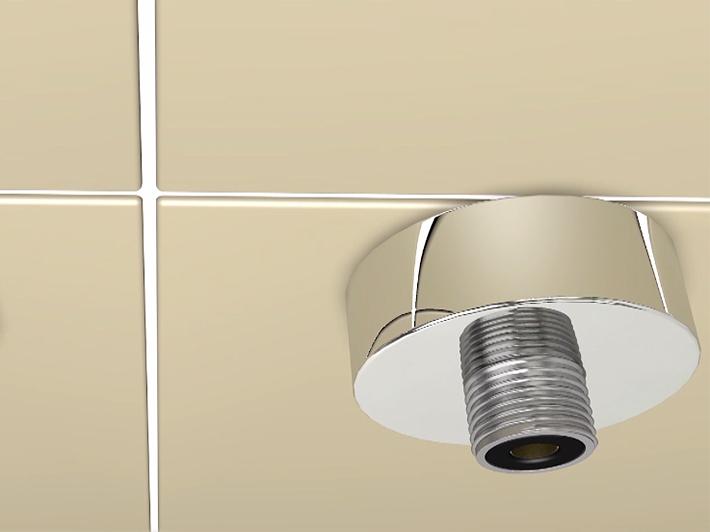
1 - Screw the s union connectors in to your fittings in the wall so that they extend by about 42 mm.
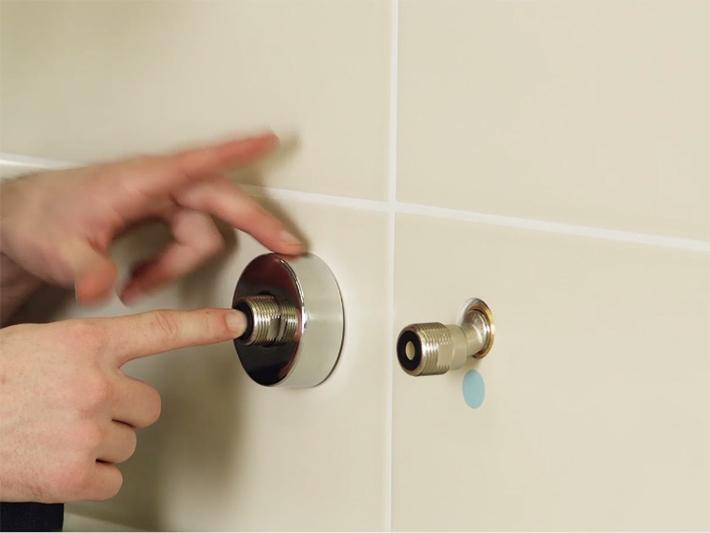
2 - Screw the escutcheons against the wall.
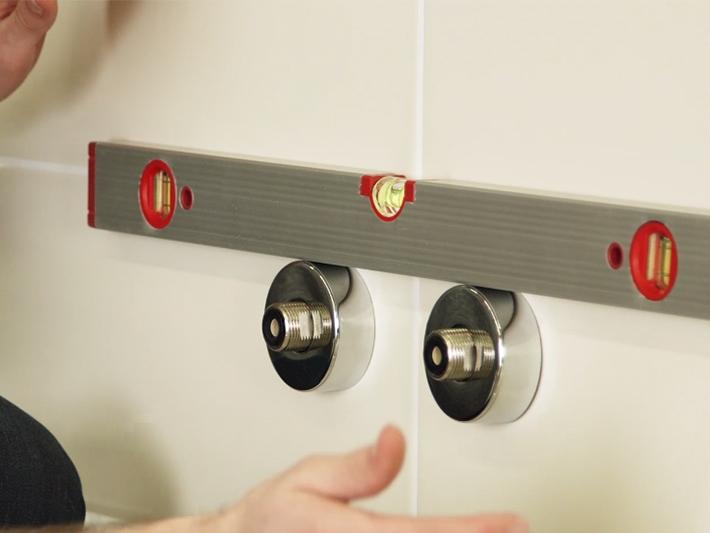
3 - Adjust the spacing so that there is 150 mm between the centres of the escutcheons, and then verify they are level . Adjust if necessary.
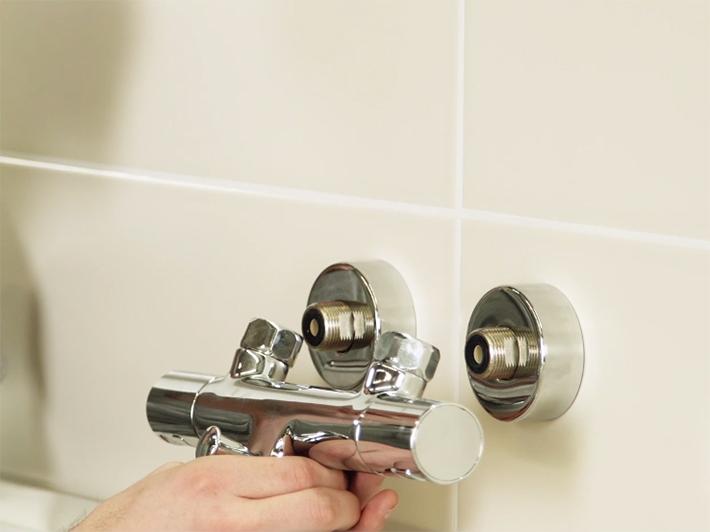
4 - Install the mixer and tighten firmly. The nuts must not touch the escutcheons. Adjust if necessary and verify horizontal positioning.
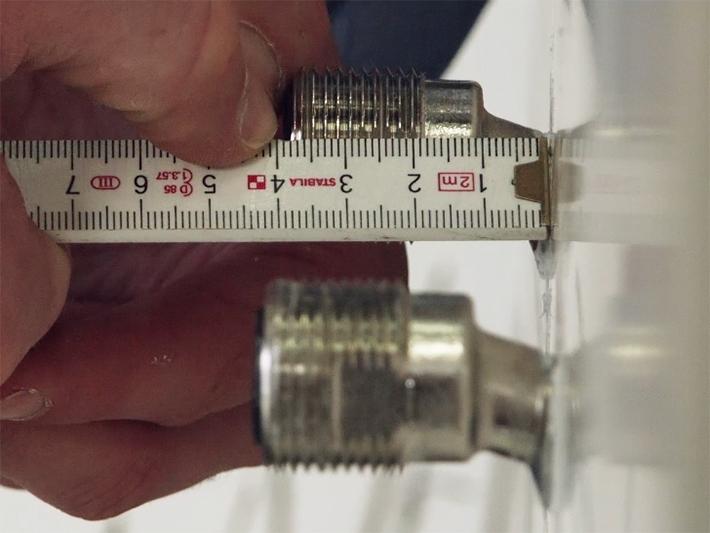
5 - Dismantle everything. Note the depth between the s union connectors and the wall.
Instalación de un mezclador termostático
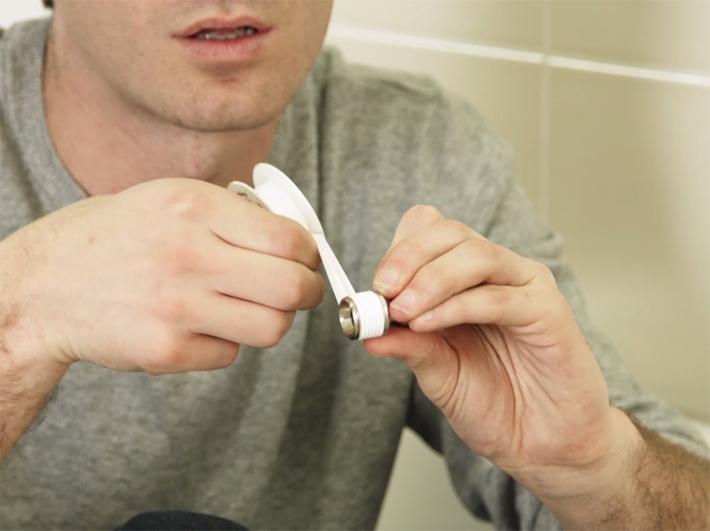
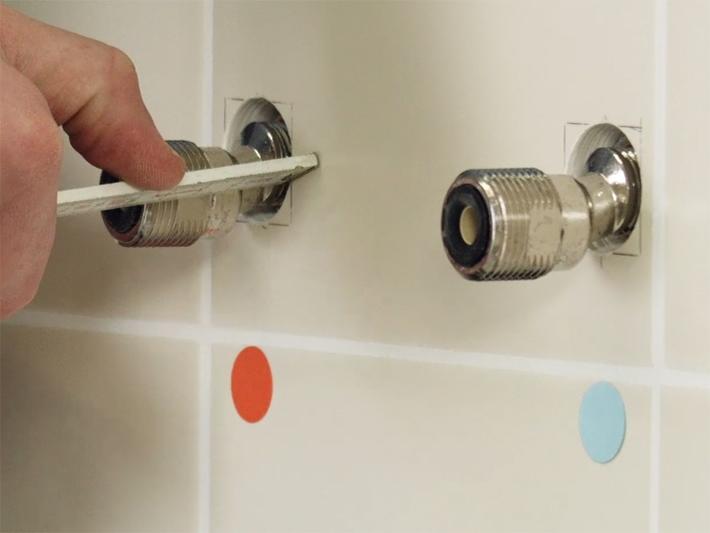
1 - Seal the thread of the s union connector using PTFE tape, wrapped in the tightening direction.
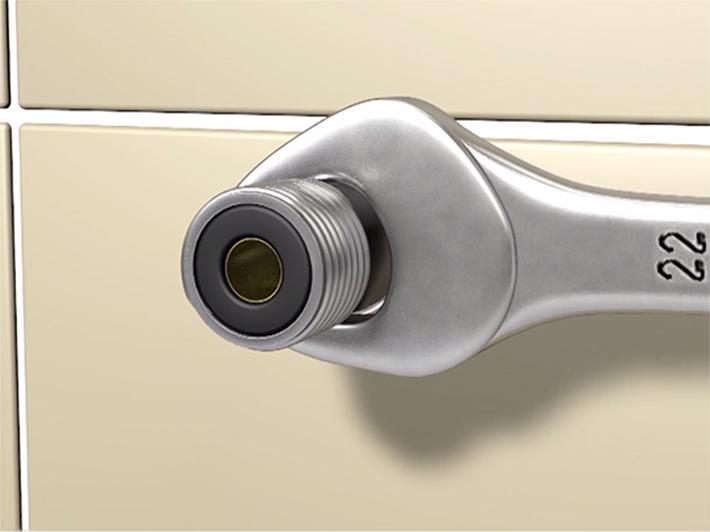
2 - Tighten the s union connectors with a 22 mm open-end wrench.
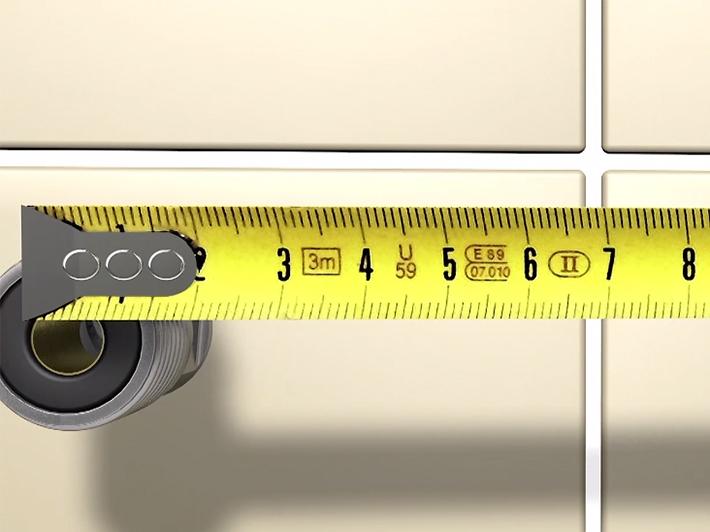
3 - Adjust the connectors so that there is a space of 150 mm centre to centre, and the same depth, as noted from your previous measurements. Then check They are level using a spirit level.
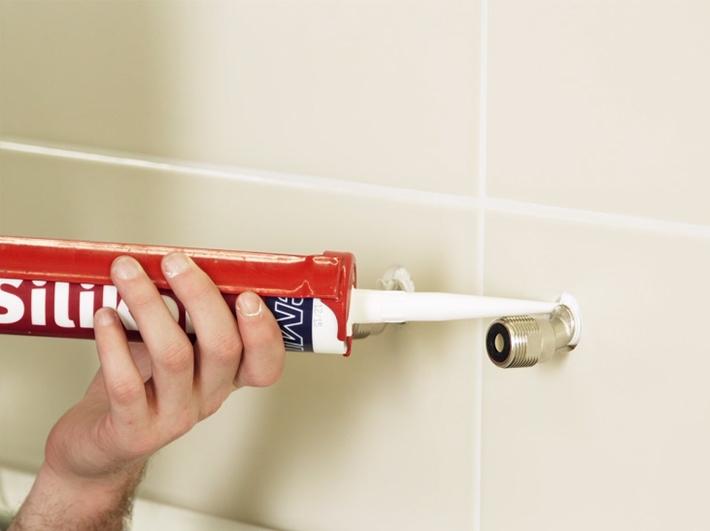
4 - Apply a silicon seal between the wall and the eccentric connectors.
5 - Screw the escutcheons onto the s union connectors.
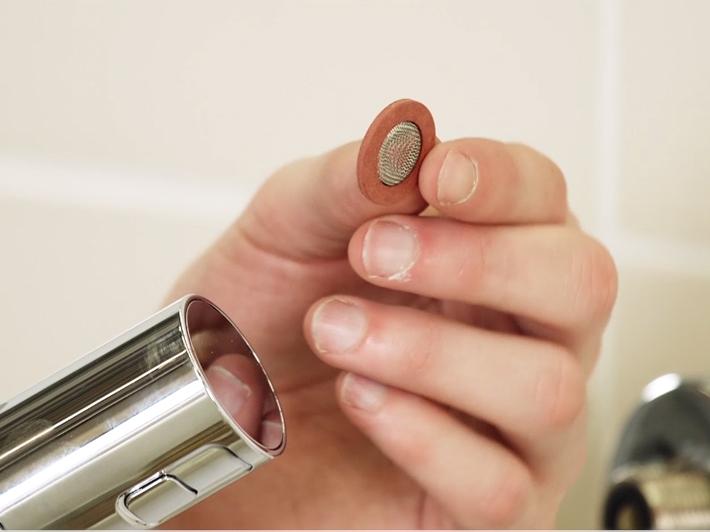
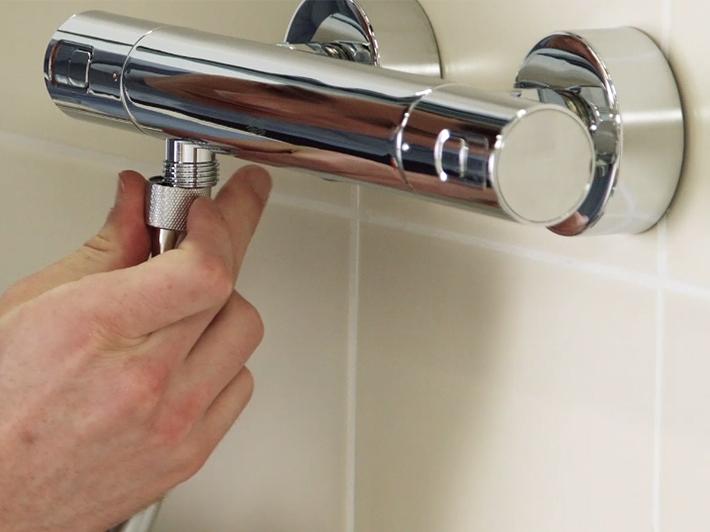
6 - Remove the red and blue caps from the mixer. Make sure the filters are placed correctly, with the rounded side facing inwards.
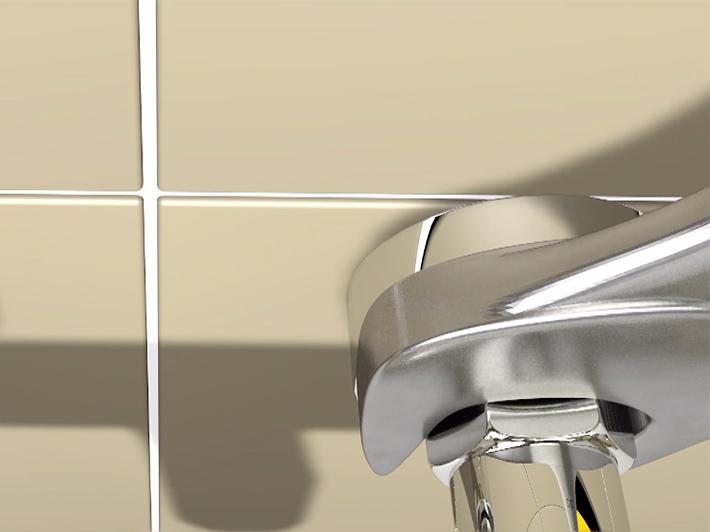
7 - Place the mixer on the s union connectors, without adding any additional seals, then tighten the nuts using a 32 mm open-end wrench.
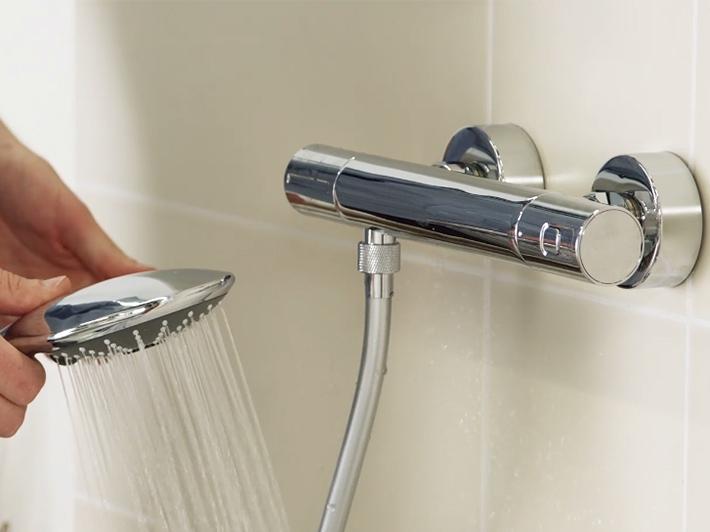
8 - Use a spirit level to make sure the mixer is level. Adjust it if necessary. Check for leaks by turning on the water supply to the mixer.
Ajustar el mexclador termostático
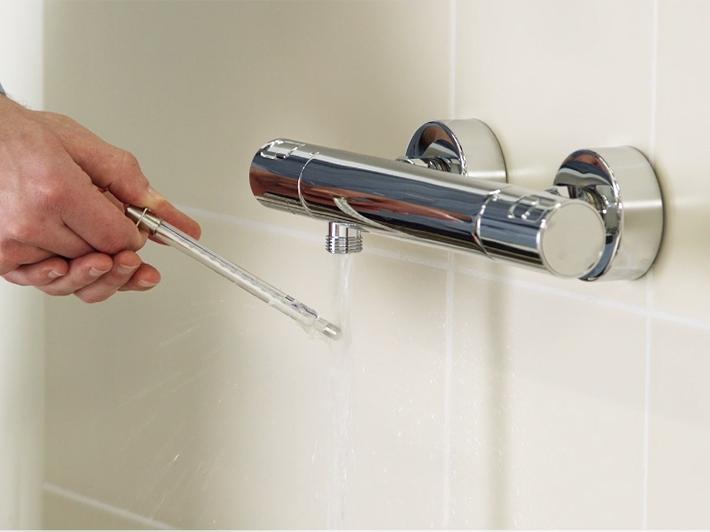
1 - Now make sure the thermostatic mixer is operating properly. Using a thermometer, check the water temperature. If it is 38°C when the handle guide lines up with the 38°C marker of the shower body, then no adjustment is needed.
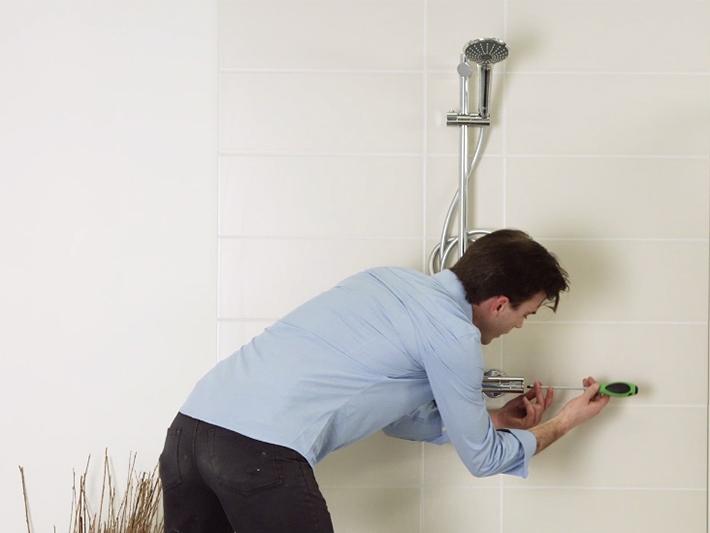
2 - If adjustment is necessary, close the water evacuation outlet and remove the cover on the mixer handle using a small flat-head screwdriver. Loosen the screw, then remove the handle.
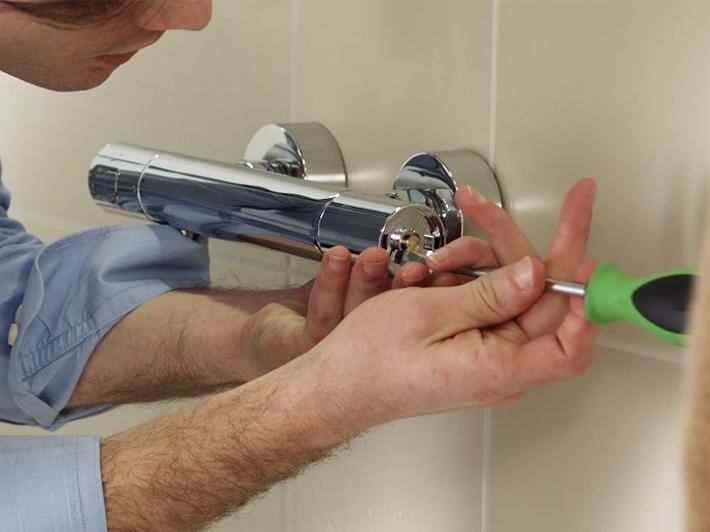
3 - Loosen the screw, then remove the handle.
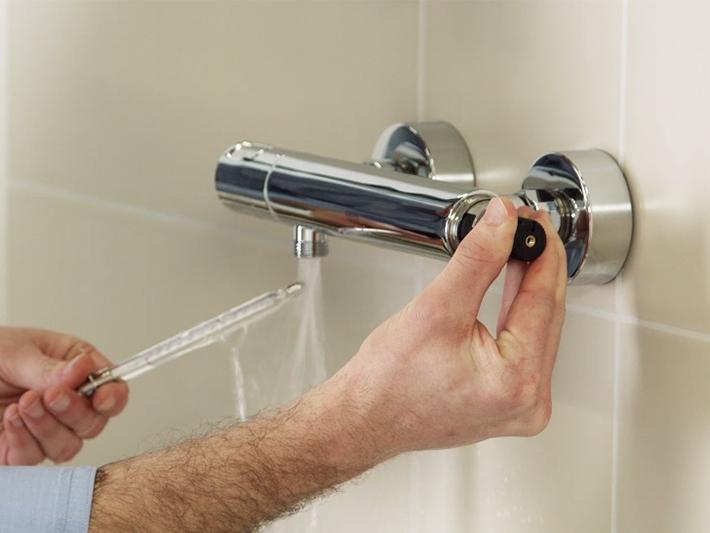
4 - Run the water. Adjust the thermostatic cartridge by turning the notched black element until the temperature reaches 38°C. Put the handle back with the guide on the handle facing 38°C. Screw in the handle and put the cover back on.
Congratulations, you have finished installing your new GROHE product.
Check our other installation guides and discover all of our products on grohe.com/uk.